 Good Wooden House since 2004
|
 |
Wooden Sheds for Bikes, Workshop, Storage, Hobbies, Botanical (High Quality) Wooden sheds, huts, other types of multipurpose small sized wooden structures (High Quality) These compact rather small in size looking structures were actually designed as Summer House (Dacha) Baths in Russian culture. They look like a well-constructed wooden shed. Generally, in this culture these baths are outdoors and separated from the main house just as restrooms are usually separated. But as we will see in our article below this beautiful small structures can be build easily and reliably used for multipurpose activities. In the modern day such a structure can now be used for different purposes while preserving the traditional Russian building style. The purposes you might use such a fine wooden structure is only limited by your imagination. A little workshop A little multipurpose storage (Store tools, wood, materials, furniture etc.) Bike garage A little space for your kids to use as their fun A showcase storage for your collections A closed little romantic structure in the middle of a rainy forest to enjoy coffee or tea while listening to the rain Anything you can imagine like a small botanical garden or similar.
These structures can be ordered as fixed projects which we already have. Another option is to completely plan your own project by consulting our architects. We can help you with pricing and designing so that you can have you own little wooden shed which you can use for your own purpose. We will keep the Russian technology while building the shed but we will convert it to your purpose. Our wooden sheds are produced using Siberian Timber obtained from the forests of Belarus and Russia. We have our manufacturing so that we don’t buy profiled wood from anyone else. First of all, you should decide for what purpose you will use the shed. We advise you to check all types of sheds, wooden Russian baths, wooden small cabins. Sheds, wooden cabins are usually small in size but still they might have size differences in their own category. It can start from 3 to 3 meters and go to 5 and more. Sizes larger than 6-7 can be considered larger sheds and can also be suitable for a more variety of uses. Sheds can have various styles of cladding: 1)Overlapping: This is the most used style which offers good insulation for changing weather 2)With tongue and groove: This creates a further strengthened insulation 3)Interlocked tongue and groove: This style will grant another layer of shielding against water 4)Glued Laminated Timber premium: The best wooden shed you can imagine if you purely focus on quality. This type of timber will provide maximum structural strength as well as insulation. It can start from 120mm and go up to 200mm. (More for bigger houses) They can also have various styles of Roofing and Entrance designs: 1)Apex Top: which looks like a common house roof. Basically, the shed will look like a smaller version of a house. 2)Pent Type: This has one sided angle. It is great for placing solar energy panels on top of it. The entrance to the structure will be frontal. 3)Netherlands Style Roofing: It reminds a barn type of look with 5 corners. The style comes from Holland and applied to the shed. 4)Flat top roof: Self explanatory 5)Solar panel roof: Desired roof type for a self-energy sufficient for the work you wish to do inside. Why should I prefer wooden structures as Baths, Huts and Sheds? Wooden Structures Provide Ease of Insulation Thanks to High Energy Efficiency; Wooden and log buildings provide better heat and sound insulation than concrete, brick, steel and aluminum due to their special properties. Wooden structures, huts, sheds create a cool environment in summer and a warm environment in winter, providing a comfortable living space. Wooden Structures Have a Long Life; Wooden structures have a longer life than concrete structures. It requires less maintenance. We see those wooden structures, built thousands of years ago in many parts of the world are still standing today. Wooden houses, which are built in accordance with climate and natural conditions, will have a very long life if they are built from wood. Wooden Structures Are Resistant to Natural Disasters; Thanks to their flexible structure, wood is one of the strongest and most resistant structures against many natural disasters such as floods, earthquakes, etc. Log and wooden houses are preferred in most of the earthquake zones. Wooden Houses Can Be Built Rapidly; It takes a very short time to build wooden sheds, huts, units, baths. The production of wooden house projects can be realized very quickly with the designs that have been cut and the skeletons prepared beforehand. The effect of weather conditions is also very important for house construction. However, in wooden structures, all the units of the houses are prepared in the factory and assembly and assembly processes are carried out in the field, thus providing the opportunity to work even in the harshest weather conditions. Wooden house materials should not be kept outside for a long time in cold weather. If the construction works are interrupted, the wood should be protected in a closed environment. Also, woods should be ventilated from time to time. Woods are Eco-Friendly and Renewable! Apart from all these, wooden, log and bungalow structures give a positive and positive energy to the environment and make the environment pleasant. Wooden houses, which have a natural structure, are quite healthy as they do not contain chemicals. Since it has a structure suitable for breathing, it allows a high amount of oxygen circulation. With its insulating properties, it is resistant to strong electric currents and therefore electromagnetic energies that occur in steel and reinforced concrete structures do not occur in wooden structures. Wooden structures absorb gases and bacteria that threaten human health compared to concrete structures and prevent their spread. Although humidity is beneficial and necessary for people, too much of it harms human health and goods. Thanks to its structure, woods allow moisture to be filtered. Wooden structures, which are a natural and environmentally beneficial material. It can be easily renewed. Due to its structure and textural features, it has a thermal insulation/isolation value that cannot be compared with other building materials. It provides 15 times higher thermal insulation/isolation value than concrete, 500 times higher than steel and 1700 times higher than aluminum.
Plastic vs Wood vs Metal Hut Which is better? Buying a new hut/shed/small structure can be a stressful time if you don't understand what suits you and what best suits your needs. In this article, we will look at three different types of materials in sheds that are currently available - wood, plastic (also called vinyl or resin) and metal sheds. All three of these materials have their pros and cons, so we will talk in detail about each of them below. This will help you make the best choice of the type you decide to buy. You may have a choice between wooden and metal and plastic sheds, but you are not sure which will deconstruct your needs and budget. I should note that I got my advice at the end of this article, so I suggest you read this information to make the most educated decision you can make. Overview of wooden sheds Wooden storages/sheds/huts are the first type of hut ever built, and they are still considered very strong and reliable. The wood used for the frame is usually spruce or pine. You can also buy wooden small structures made of fir or cedar. But it will be more expensive. Pine gives the best price/performance by far. * The walls and roof are mostly made of wood veneer or plywood. Depending on the model you buy, it may come with wood or vinyl siding. If there is no siding, you will want to cover the outside with paint. The best thing about drawing is that you can change the color at any time. * Wooden sheds have a classic look. They are more attractive than other species. If you compare the three types of materials, most people would choose a more beautiful wooden version. * The roof of the shed (only if it is not painted) should be covered with tiles, like a house. The bonus is that you can match the tiles in your hut with the tiles in your house, if any. The interior finish will again be sheathing or plywood. Before we touch on the pros and cons of wooden hangars, let's look at a few more features. • When you buy a wooden hut, you may have the option to buy a pre-assembled one, which is great! Even better, if you can afford it, make sure it's delivered and assembled to save time. Many hangars are sold as a set, that is, they are delivered in parts. • If you have the necessary tools and time to assemble the shed yourself, then this is a way to save a few dollars! If you left the hut on Friday, this will be a great weekend project because it will probably take you a few days to put it together. If you are already a master of carpentry and have some help, then you can do carpentry once a day. • As mentioned earlier, if you want it to be weather resistant, you should brew your shed (if possible, but not necessarily). To improve this waterproofing, I would recommend installing a cornice so that the water flow from the roof is further away from the tree and helps prevent rotting. It will also help to make sure that there is a good layer of paint in the shed. It is also recommended to retouch the paint if necessary. This will also help with profit resistance. • If you buy a cedar hut, you won't have to worry about insect problems, as cedar is a natural insect repellent and insect repellent so as the different sorts of pine wood also, they have a very pleasant odor. Who doesn’t like pine honey? Or walking between the pine trees after the rain to smell the pleasant smell One positive thing is that you don't have to worry about a wooden hut that is rusting like a metal hut. • One thing we think is important in an outdoor hut is to be able to customize. If necessary, with a wooden porch, it is quite easy to add shelves. Attaching the racks to the shed ensures that you will have a strong and reliable structure for the weight. It's always great to have extra shelves! Since it is a wooden frame, you can also cut an additional window if necessary, or even drill holes inside the hopper to run lines for solar power. If you decide to install an October solar panel on the roof, this will give you additional lighting, as well as the ability to power small appliances. * Doors in wooden hangars are not always the safest, but since this is the wood, you are working with, you can strengthen the door included in the kit or remove it and install something more durable to get a suitable lock. This option will depend on your skill level. • However, regarding personalization, I would like to add the option of adding another window. On the other hand, if you decide you don't want a window, you can remove the window and close the hole using the same wood materials and then finish it with paint, and it would be hard to tell if that happened. the window! I also saw some beautiful huts with a window box for flowers, as well as blinds for the sake of appearance. The options are as endless as your imagination!
Is it difficult to build a shed? If you want to believe it, you don't want to, but you don't have to be a professional to build a garden shed! With a little help, assembling a carport is a standalone task that's easier than you might think. Below is a simple guide on how to build a traditional apex garden shed. A complete assembly instruction is attached to your tiger shed. These instructions are a simple step-by-step instruction on how to assemble a canopy. Remember – your barn can have more than four sidewalls, so the assembly in this case will be slightly different!
What do I need to build a shed? Before you even think about assembling a garden house, you need to do three things: 1. Check your base 2. Check your components 3. Make sure you have the necessary tools and at least one other person to support You should have a solid and level base on which you can build your barn. This should be done with a suitable durable material, such as concrete or paving stone. If you are not sure how to do this or want to get some recommendations to make sure that your base is correct, please read our "Guide to creating a base". It is very important that you also check that all your components are in place to complete the assembly. With the delivery of your barn, you will receive a list of components that will allow you to compare the parts received with those that you should have. As a rule, any garden shed consists of panels for four walls, floor and roof, felt and fasteners. Important tip: Take the time to check the components before assembly, this will help a quick and efficient assembly process. The last preparation you need to do for assembling your garden shed is to make sure you have all the tools you need. To build tiger canopies, you will need the following: • Hammer * Wrench or adjustable wrench • Stepladder * Spirit level • Roulette * Protective gloves or appropriate PPE Important tip: For safety reasons, we would recommend that the installation of the carport is always carried out by at least two people – one person must hold the components and the second person must nail or screw them. When you have checked and prepared everything necessary for the assembly, you are ready for the assembly of the barn.
Step One - Install the bottom plate again Place the plate (plate) bottom in the desired position, and make sure that the bottom is smooth. If the floor is uneven, you may need to put under the supports several blocks to align the base. At this point, you can check if the floor is square and measure it diagonally from corner to corner. Each measurement of the diagonals must be identical. The most important tip: if your floor is not square, you can measure the panels to make sure that they match the corresponding side of the floor. If this is the case, it is possible that the plate was simply moved during transportation. You can solve this problem by tapping on the floor at the corners to align it again. Step two - Position and fasten the gables and sides First, install a gable end plate at one end of the bottom plate. Then install the sidewall panel and fasten it to the pediment with 38mm nails. You need to drive the nails through the side into the pediments from the inside. Using the supplied screws, fix the gable plate to the side wall through the pre-drilled holes in the gable on the outside. Now you need to put the second gable board in its place and attach it to the sidebar that has just been installed. Again, use the supplied 38 mm nails and self-tapping screws. Finally, install the last sidewall panel and secure it with nails and screws, as before. When all your wall panels are in place and you make sure they are straight, fix them to the floor with the included 65mm nails. You need to hammer the nails through the guides of the bases of the side and gable slabs, through the floor slabs and into the underlying beams / supports of the floor. Top tip: on the bottom plate, where the bottom plates were fixed to the supports, there are rows of nails. They can be used as guides to ensure that you fix the base guides at the right points to penetrate into the supports below.
Step three - Install and fasten the roof panels. Reinstall the roof panels and fasten them into each other using the supplied 65 mm nails. You may need to pull the two plates together at the top before you can nail them together. Then nail the roof to the gables and side frame part using the supplied nails with a diameter of 38 mm and 65 mm. Important tip: if at any time the roof tiles are not aligned correctly or the door does not open / close properly, this may indicate that the building is not sitting directly on your substrate and has twisted. To solve this problem, you may need to slightly lift one or more corners of the building to straighten it. If they are square, then you can fix the roof panels. If you have problems with this and need further advice, please read our online reference guide.
Step four - felt roof Before starting work, please note that for some sizes of buildings it may be necessary to cut the felt into two or more parts. Please refer to the instruction manual that you will receive along with your building for more information. After checking the required number of cuts of felt, if necessary, cut the resulting felt and roll it along the bottom of one side of the roof. Provide enough overhang to lower it to the roof frame (but not to the lower side of the roof). Use the supplied nails for fixing to the top edge felt. Repeat this procedure with the other side of the roof. Depending on the size of the building, you may need to repeat this procedure along the upper sections of the roof, overlapping the felt at the top. Not all buildings require a skate element, so it's best to check the felt guide if you are not sure. Important tip: do not install the felt too low when laying the first strip, as you will find that it is not enough to cover the roof. You only need an overlap of about 3 inches, and then you will have enough space to cover it with the included felt. Step Five - Adjust and secure the barge boards Attach the barge boards to the roof panels, holding the drooping end of the felt between them to ensure airtightness from bad weather. When you are satisfied with the location of the barge boards, attach the diamond-shaped tips to the barge boards at the top. The most important tip: barge boards are usually slightly longer than roof panels. However, if you prefer, you can trim them so that they are flush with the edges of the roof. To do this, press the boards to the ends of the pediment and cut them off before holding them. Step six - Install and seal the glazing. Insert the glass or styrene into the desired position and fix it with the included pins of the panel. You need to carefully insert the pins into the window frame to prevent the windows from being scratched. If you have styrene windows for your building, you need to remove the protective film from the glasses. You need to seal the windows after installing the glasses to make sure that they are weatherproof. To do this, use a suitable sealant, such as silicone, mastic, putty, etc., as well as beads of your choice to strengthen the glasses, if it is preferable. The most important tip: to prevent the glass from being scratched when the pins are clogged, you should leave the protective plastic on the glasses until it is installed. You can also use a piece of thin cardboard or something similar to prevent the hammer from coming into direct contact with the glasses. Step Seven - Install the corner moldings To finish the assembly, use the supplied 38 mm nails to fix the corner moldings to the outer corners of the carport, where the panels converge. They may need to be cut to size. Now it remains only to treat your garden shed inside and outside with a suitable waterproof preservative. Of course, this extra bit of information will give you great idea how to assemble your shed yourself but we advise you to get best materials and design. For these last two you can always refer to our company. We will use glued laminated timber for the walls and the roof. Call us or send an e-mail to us by also check our website ownwoodenhouse.com for more information about how to contact. We also have a frequently asked questions section where you can get more info about our company and about how to order your desired items from us.
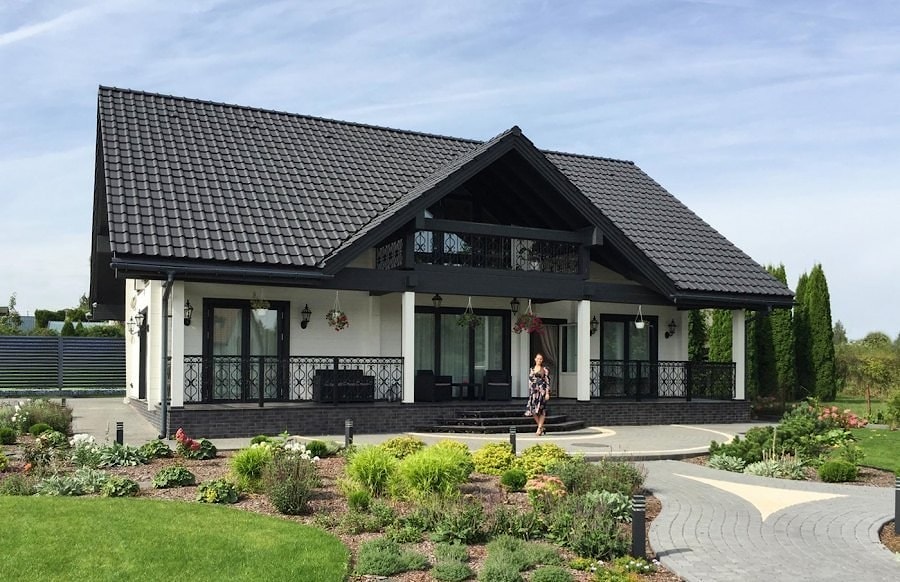
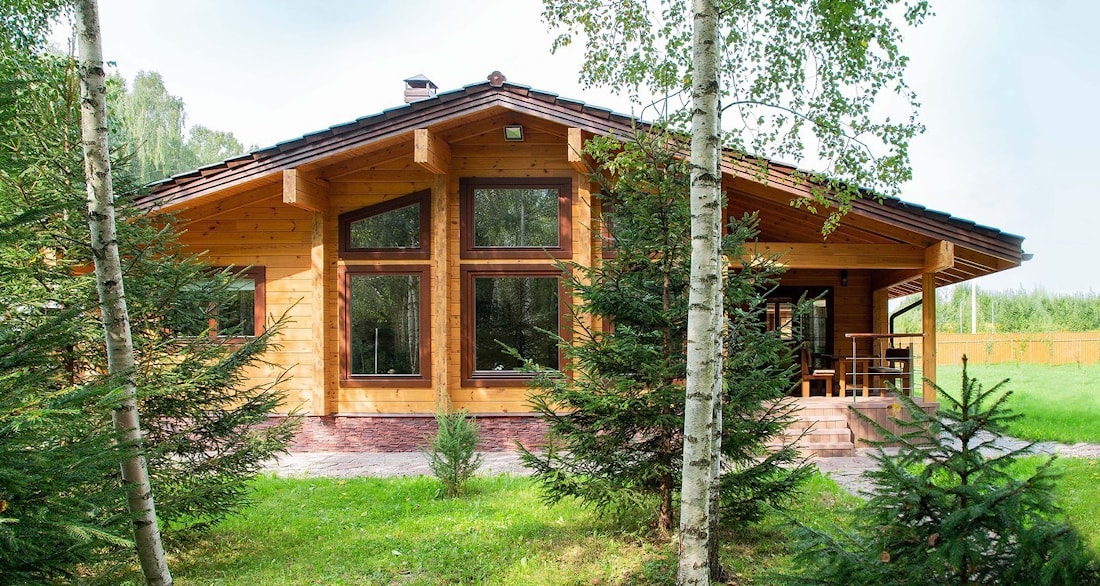
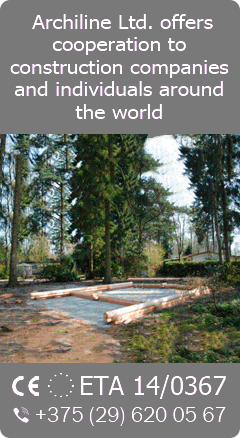
ArchiLine Ltd. has been successfully working in wooden construction market since 2004. Specialists of the Сcompany have produced and built hundreds of wooden houses in different countries - Australia, Belarus, Germany, Georgia, Spain, Kazakhstan, Kyrgyzstan, Lebanon, the Netherlands, UAE, Poland, Russia, France. During this time, we've built not only wooden houses, we’ve built a reputation as a strong, reliable and ethical partner. Unique technological materials, the professionalism of our specialists, Finnish technologies and an individual approach to each customer helped us to become leaders in wooden house building. Our advantages: We speak English, German, Turkish, French and Russian +375298-06-05-67 -- WhatsApp, Telegram, Viber Look more: Wooden house made of glued laminated timber "White House" Look more:You can see a video-review of the wooden house "Mirage":Wooden house "Mirage" from profiled glued timber 99m2 If you want to buy wooden Sheds for Bikes, Workshop, Storage, Hobbies, Botanical (High Quality) , you can:
Call:
|
|
© 2026
ArchiLine Wooden Houses
114-49, Necrasov str., Minsk, Republic of Belarus, 220049
The site is powered by Nestorclub.com google.com, pub-6447061049723989, DIRECT, f08c47fec0942fa0 | |